
Introduction
When publicly exposing AWS resources (like an EC2 instance), the security groups allow you to control incoming and outgoing traffic.
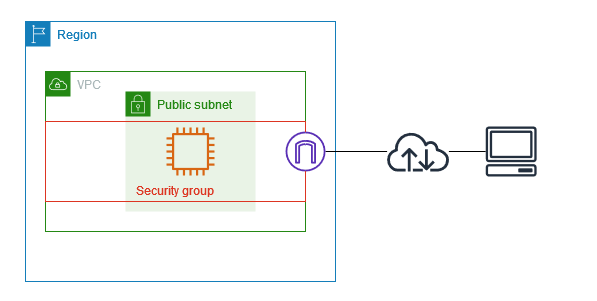
This is especially required to control incoming SSH connections if we expose an EC2 instance (therefore a VM) on which can for example run a website.
Indeed, even if the access to the instance is already controlled by the key pairs , it remains a very bad practice to expose a too wide ssh access, even to the entire web.
Recent news has offered a reminder on this subject with the backdoor flaw in the
xz-utilslibrary which has showed that we cannot rely solely on ssh to secure access to a resource.
The logical solution if you work alone on this AWS resource is to only authorize SSH access to the public IP address of your PC. However, this IP may constantly change (rebooting the router, using the PC in different locations).
This is why we will see in this article how to dynamically update this IP address using a Powershell script that you can schedule on your Windows PC.
Use case
We will study the following case:
- AWS EC2 instance Linux with a public IP (with Elastic IP)
- Expose ports 80 and 443 (http and https) of the instance to the entire web
- Expose ssh port 22 only to the user’s PC
- Dynamically change the IP defined in the AWS EC2 instance configuration for ssh access when the user opened their Windows session
We will therefore see how to use the AWS tools for Powershell which allow you to perform administration tasks on AWS resources, including EC2 instances.
In our case, we will have to work with the security groups which allow us to control incoming and outgoing flows to our EC2 instance.
It will therefore be necessary to create a Powershell script which will modify the security rule of ssh port 22 for the security group to which our EC2 instance is attached, and schedule it to be executed when the user logs on to Windows.
We will not detail here the creation of the EC2 instance or of the security group. So we consider the latter created with incoming rules as below.

IAM user creation
The script will need access to the AWS account used to manage the EC2 instance, with sufficient rights to make changes to the security groups. This is provided by the account IAM (Identity and Access Management) interface.
We will not use the IAM Identity Center functionality here, which is aimed at human users (activation by e-mail address, etc.).
Creating the user group
In accordance with AWS best practice, we will create a user group to which we will grant sufficient rights rather than defining them directly for the user.
This is done very simply on the AWS account IAM interface from the Access management -> User groups menu available on the left panel of the page.

We will only indicate the name of the group when it is created in the following menu.

And that’s all, the created group appears in the list on the Access management -> User groups page.

Adding a permissions policy to the group
Now we are going to grant sufficient rights to the group we have created so that we can make the security group changes we want.
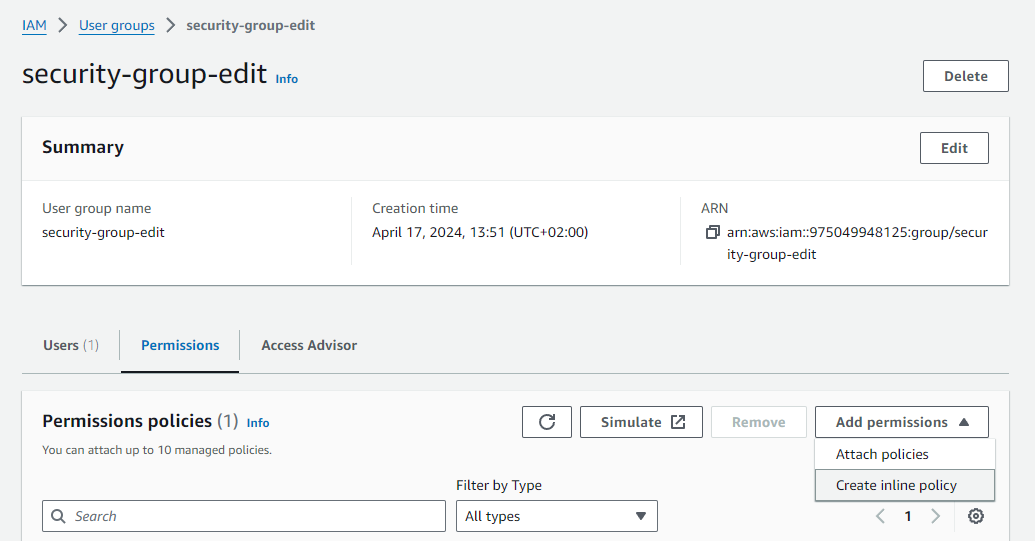
To do so, select the group from the list on the Access management -> User groups page, choose the Permissions tab and click Create inline policy in the Add permissions drop-down menu.
We’re going to add the following permissions policy in json format.
{
    "Version": "2012-10-17",
    "Statement": [
        {
            "Effect": "Allow",
            "Action": [
                "ec2:DescribeInstanceAttribute",
                "ec2:DescribeInstanceStatus",
                "ec2:DescribeInstances",
                "ec2:DescribeNetworkAcls",
                "ec2:DescribeSecurityGroups",
                "ec2:DescribeSecurityGroupRules",
                "ec2:ModifySecurityGroupRules",
                "ec2:CreateSecurityGroup",
                "ec2:DeleteSecurityGroup"
            ],
            "Resource": "*"
        },
        {
            "Effect": "Allow",
            "Action": [
                "ec2:RevokeSecurityGroupEgress",
                "ec2:RevokeSecurityGroupIngress",
                "ec2:AuthorizeSecurityGroupEgress",
                "ec2:AuthorizeSecurityGroupIngress",
                "ec2:UpdateSecurityGroupRuleDescriptionsEgress",
                "ec2:UpdateSecurityGroupRuleDescriptionsIngress"
            ],
            "Resource": "arn:aws:ec2:*:*:security-group/*"
        }
    ]
}
In particular, we will use the ec2:RevokeSecurityGroupIngress and ec2:AuthorizeSecurityGroupIngress rights to make the changes we want to the security groups of the EC2 instance (available in the arn:aws:ec2:*:*:security-group/* resource).
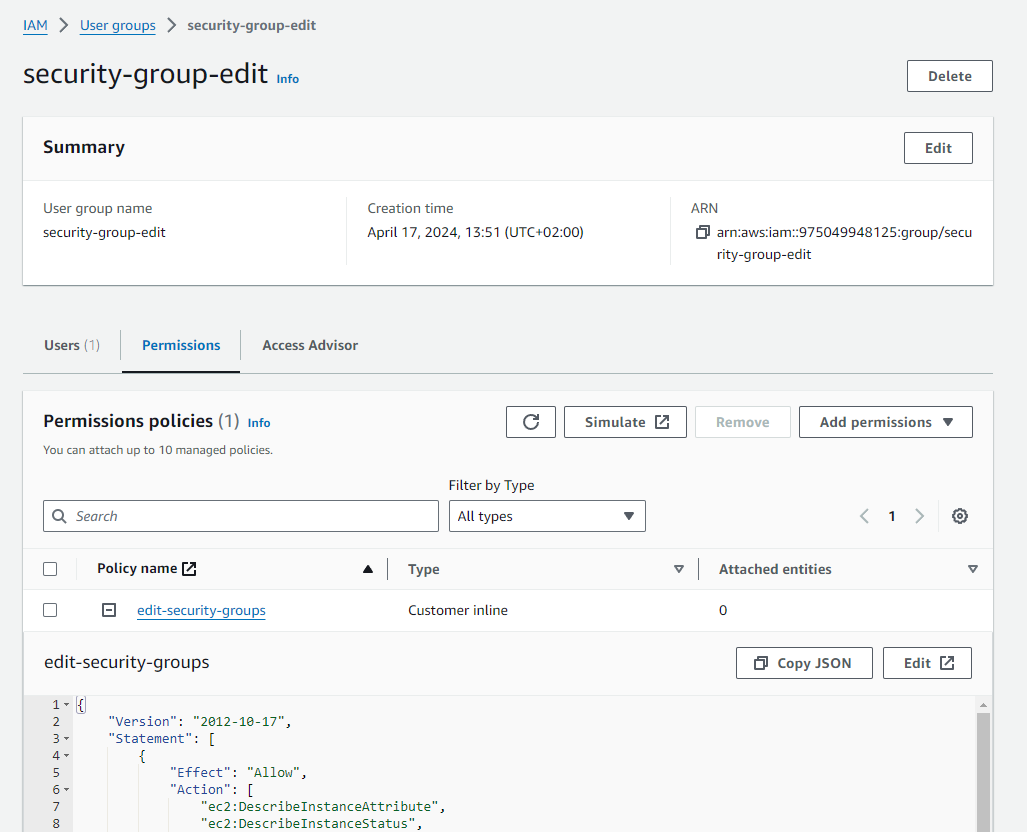
Finally, the permissions policy appears in the user group definition.
Adding an IAM user to the AWS account
Now we can create an IAM user who will have the desired rights.
Simply go to the Access management -> Users menu available on the left panel of the IAM interface, then create the user from this page.

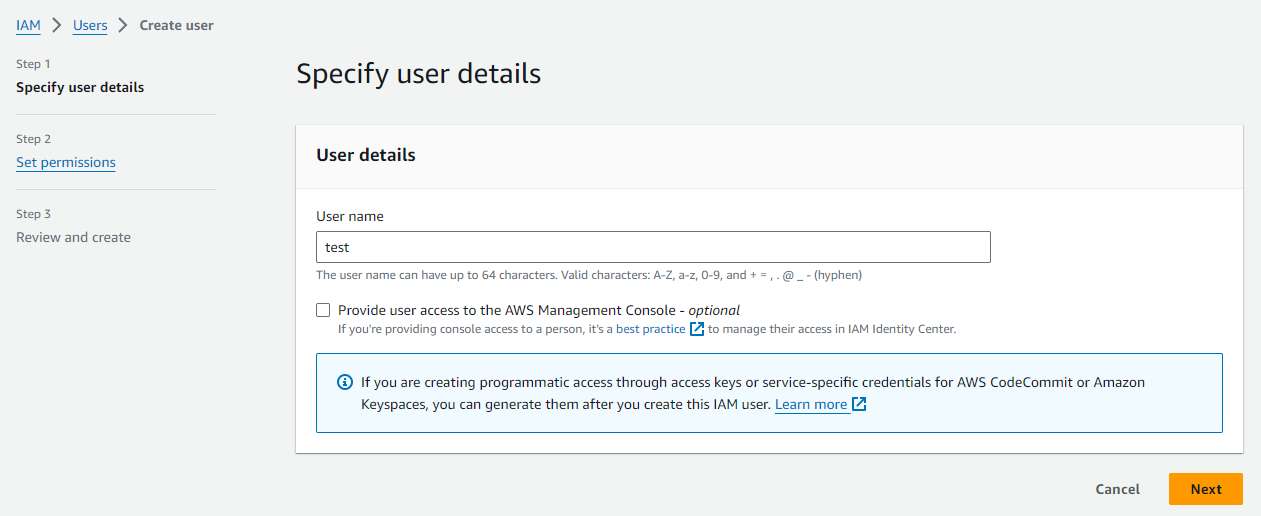
We can then first define its name.
And then we will attach it to the group we have created so that it has the rights we want.
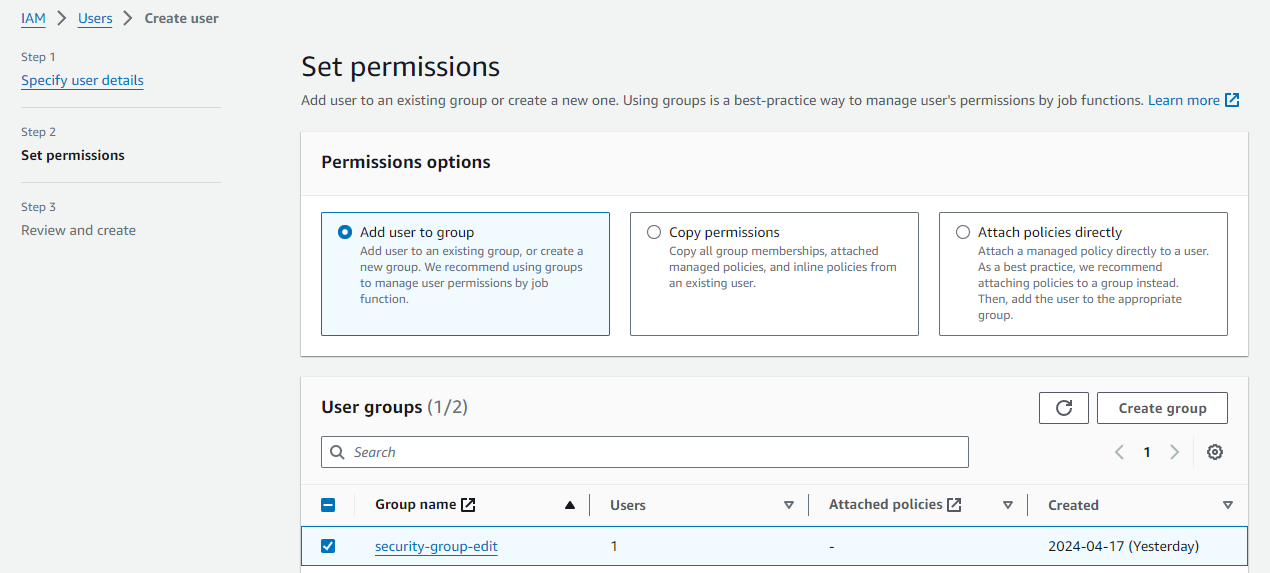
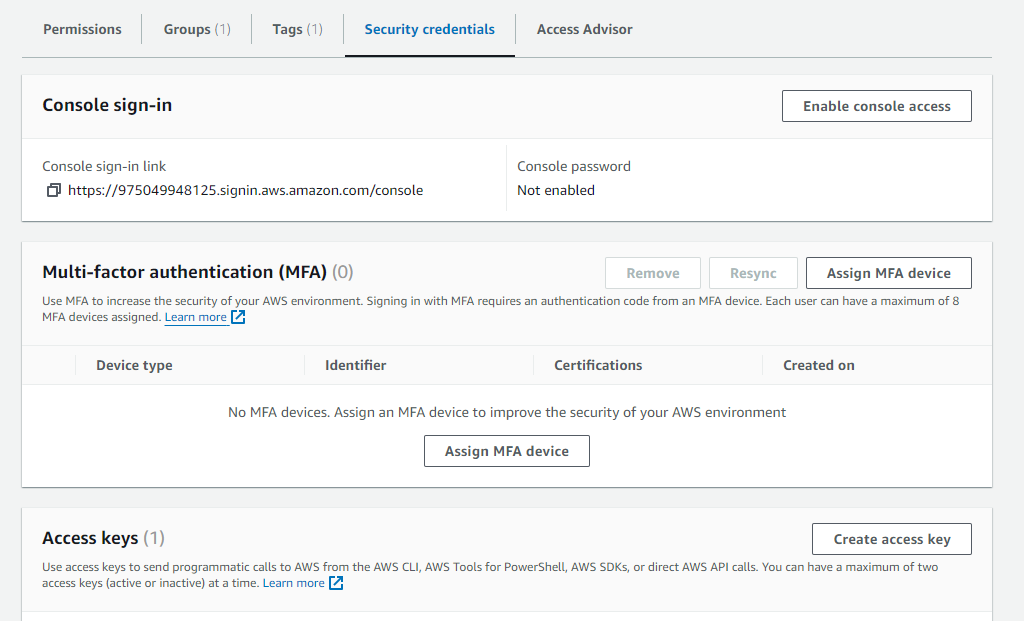
Finally, after validating the last verification step, we will be able to select the user and create an access key in the Security credentials tab.
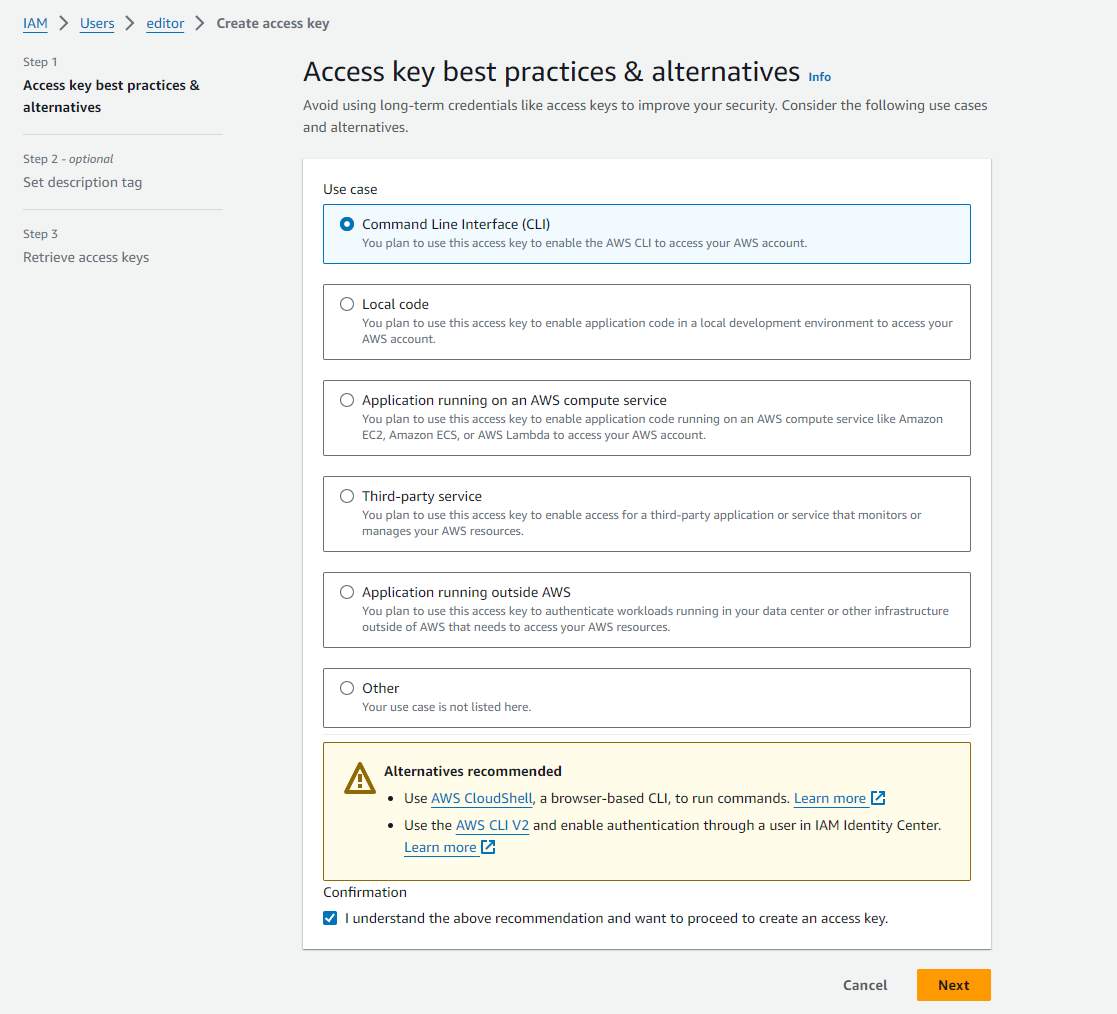
First we need to define the use case as Command Line Interface (CLI) and check the confirmation box at the bottom.
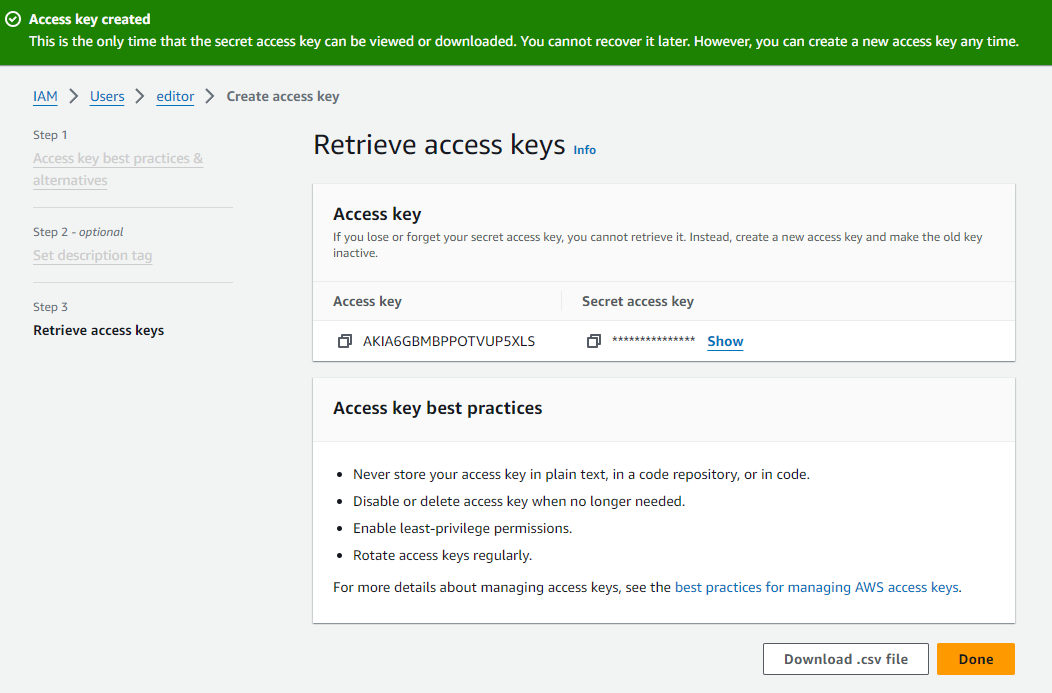
Finally, in step 3 we obtain the access key and its password to save in a secure location to be used later by the script.
Add the access key to Windows Credential Manager
We are going to securely store the generated access key in Windows Credential Manager, which will also allow it to be easily retrieved in the Powershell script.
This is very easy to do in Powershell after installing the Powershell Credential Manager module. We will give the name aws-editor-key to the Windows Credential Manager entry corresponding to this key.
Install-Module CredentialManager

# Récupérer la clef précédente et son mot de pass
$awsAccessKeyName = "XXXXXXXXXXXXX"
$awsAccessKeyPass = "XXXXXXXXXXXXX"

New-StoredCredential -Target 'aws-editor-key' -Type Generic -UserName $awsAccessKeyName -Password $awsAccessKeyPass -Persist 'LocalMachine'
Automating IP renewal
We are now going to look at how to automatically renew the IP address defined in the incoming ssh rule for the EC2 instance.
Powershell script
Having created an IAM user with sufficient rights to modify the security groups on our instance, we can now produce a Powershell script that will automate the change of the IP address authorized to connect to the EC2 instance via ssh.
# Dependencies : install the following PS modules
# Install-Module -Name AWS.Tools.Installer
# Install-AWSToolsModule AWS.Tools.EC2
# Install-Module -Name TUN.CredentialManager

# Prerequisites :
# - aws user credentials saved into Windows Credential Manager
# - on aws : usern rattached to policy with enough rights

#############
# Variables #
#############

# AWS configuration

# Regions can be an array (like @("eu-west-3", "eu-west-1")) to match the security groups
# or a string to apply the value to all security groups
$regions = "eu-west-3"
# Security group names array
$securityGroupNames = @("launch-wizard-3")
# Aws profile name where credentials are stored
$awsProfileName = "editor"
# In case of other value for ssh port; otherwise, default value is 22
# $sshPorts = @(22, 22)
# Same for cidrMask with default value 32
# $cidrMasks = @("32", "32")

# Windows Credential Manager target
$wcmAwsTarget = "aws-editor-key"

##########
# Script #
##########

# Get current public IP address
$ipAddress = (Invoke-WebRequest ifconfig.me/ip).Content.Trim()

# Set AWS credentials from profile, create profile if not done
$credentials = (Get-AWSCredential -ProfileName $awsProfileName)
if (!$credentials) {
    # AWS credentials from Windows Credential Manager
    $awsCredentials = Get-StoredCredential -Target $wcmAwsTarget
    $accessKeyId = $awsCredentials.UserName
    $secretAccessKey = (New-Object PSCredential 0, $awsCredentials.Password).GetNetworkCredential().Password

    Set-AWSCredential -StoreAs $awsProfileName -AccessKey $accessKeyId -SecretKey $secretAccessKey
    Write-Output "INFO - AWS credential profile '$awsProfileName' created"
}
Set-AWSCredential -ProfileName $awsProfileName

# Set default region for all following commands if $regions is a string
if ($regions.GetType().Name -eq "String") {
    Set-DefaultAWSRegion -Region $regions
    Write-Output "INFO - Region set to $regions for all security groups"
}

$i = 0
foreach ($securityGroupName in $securityGroupNames) {
    # Setting the region if $regions is an array
    if ($regions.GetType().Name -eq "Object[]") {
        Set-DefaultAWSRegion -Region $regions[$i]
        Write-Output "INFO - Region set to $regions[$i] for '$securityGroupName' security group"
    }

    $securityGroup = (Get-EC2SecurityGroup -GroupName $securityGroupName)
    if (!$?) {
        Write-Output "ERROR - '$securityGroupName' security group is not available on the AWS instance"
        continue
    }
    $securityGroupId = $securityGroup.GroupId

    # Setting ssh port and IP range CIDR mask
    if (Test-Path variable:global:sshPorts) {
        $sshPort = $sshPorts[$i]
    } else {
        $sshPort = 22
    }
    if (Test-Path variable:global:cidrMasks) {
        $cidrMask = $cidrMask[$i]
    } else {
        $cidrMask = 32
    }
    $newIpRange = "$ipAddress/$cidrMask"
    Write-Output "INFO - Setting $newIpRange IP range for ssh, '$securityGroupName' security group"

    # Get security group IP range set for ssh inbound rule
    $securityGroupIpRange = ($securityGroup.IpPermissions | Where-Object { $_.FromPort -eq $sshPort } | Select-Object -ExpandProperty Ipv4Ranges).CidrIp
    if ($newIpRange -eq $securityGroupIpRange) {
        Write-Output "INFO - $newIpRange ssh IP range was already set. Nothing to do for '$securityGroupName' security group"
        continue
    }

    # Revoke current security group ingress rule for SSH
    $ipPermissionOld = New-Object Amazon.EC2.Model.IpPermission
    $ipPermissionOld.IpProtocol = "tcp"
    $ipPermissionOld.FromPort = $sshPort
    $ipPermissionOld.ToPort = $sshPort
    $ipPermissionOld.IpRanges.Add($securityGroupIpRange)

    Revoke-EC2SecurityGroupIngress -GroupId $securityGroupId -IpPermission $ipPermissionOld
    Write-Output "INFO - $securityGroupIpRange ssh IP range removed for '$securityGroupName' security group"

    # Add the security group ingress rule to allow SSH from current IP address
    $IpRange = New-Object -TypeName Amazon.EC2.Model.IpRange
    $IpRange.CidrIp = $newIpRange
    $IpRange.Description = "SSH from Home"

    $ipPermission = new-object Amazon.EC2.Model.IpPermission
    $ipPermission.IpProtocol = "tcp"
    $ipPermission.FromPort = $sshPort
    $ipPermission.ToPort = $sshPort
    $ipPermission.Ipv4Ranges = $IpRange

    Grant-EC2SecurityGroupIngress -GroupId $securityGroupId -IpPermissions $ipPermission
    Write-Output "INFO - $newIpRange ssh IP range successfully set for '$securityGroupName' security group"

    (++$i)
}
Please find a few comments on the script:
The Powershell module dependencies are:
AWS.Tools.InstallerthenAWS.Tools.EC2, andTUN.CredentialManagerfor access to Windows Credential Manager.The script supports several security groups if required in the
$securityGroupNamesarray.The user can either set a unique AWS region for all security groups as
$regionsvariable, or giving them as an array for each group defined into$securityGroupNames.It is possible to define for each security group the ssh port and the CIDR mask of the allowed IP range (
$sshPortsand$cidrMasksarrays), otherwise the default values22and32will be respectively applied. For CIDR masks, it does not make sense here to choose another value, as you only want to apply the rule to a unique IP, but this leaves the door open to modifications to apply it to a range of IPs.The public IP of the PC is retrieved using the command
(Invoke-WebRequest ifconfig.me/ip).Content.Trim().The IAM user credentials are retrieved from Windows Credential Manager and then applied to the AWS configuration by defining a profile
$awsProfileNamewith the commandSet-AWSCredential -ProfileName $awsProfileName. Similarly, the AWS region is defined with the commandSet-DefaultAWSRegion -Region $region.Next, in the loop over the various security groups, the following tasks are performed:
- Comparison of the new IP range with that retrieved from AWS
- If identical, do nothing.
- If different, we remove the current ssh security rule from the security group, and create a new one based on the PC IP address.
And that’s it! When the script is run, you can then check whether the changes have been applied to the security groups of the EC2 instance.
Scheduling the script
Now we are going to schedule the script using the Windows Task Scheduler.
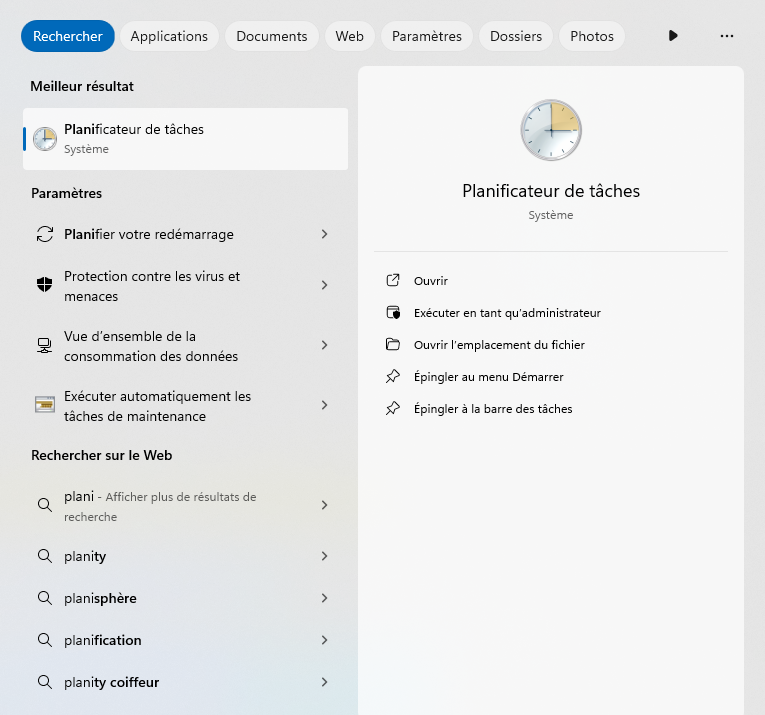
Simply go to the Action -> Create a task menu first.
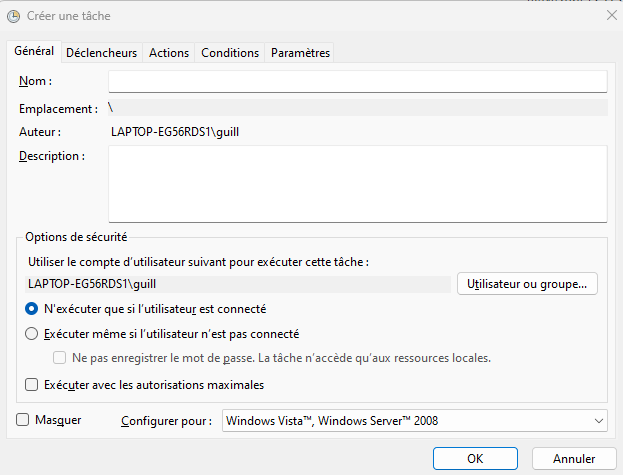
After filling in the fields in the “General” tab as required, we’re going to define the conditions for triggering the script in the “Triggers “ tab by clicking on New.
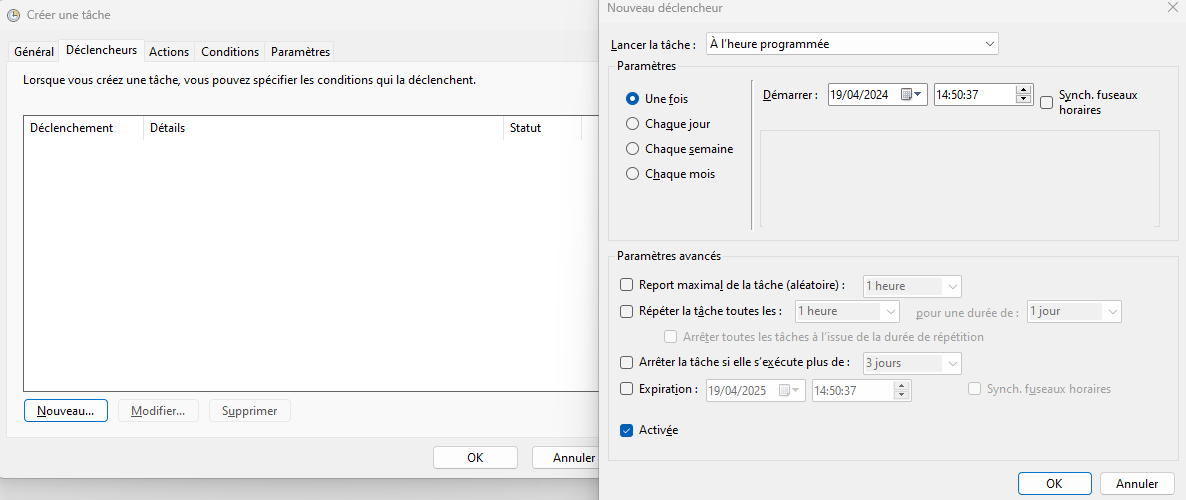
We are going to define the following fields:
Start taskwith the valueAt the time of connection to a user session.Connection from local computerjust below.
This way, we ensure that the script is launched each time the user logs on to his session, which was our initial objective.
We can also set the retry on failure policy and other execution parameters in the Parameters tab.
We can then check whether the script has successfully run by looking at the scheduled tasks table.

